|
When people look at what you've built, they won't see the wonderful joints you've spent so much time and effort making. They'll see the design, which includes your choice of boards and their positioning, and they'll see the finish. 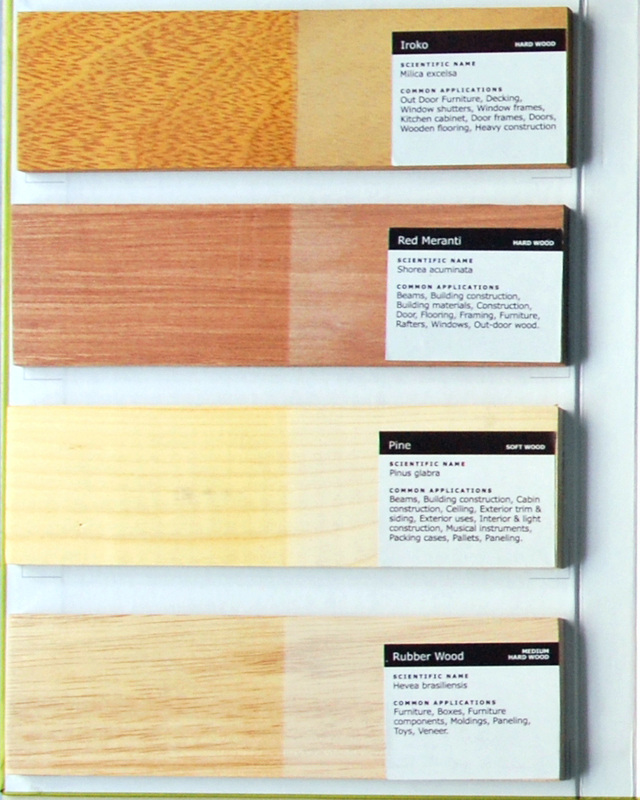 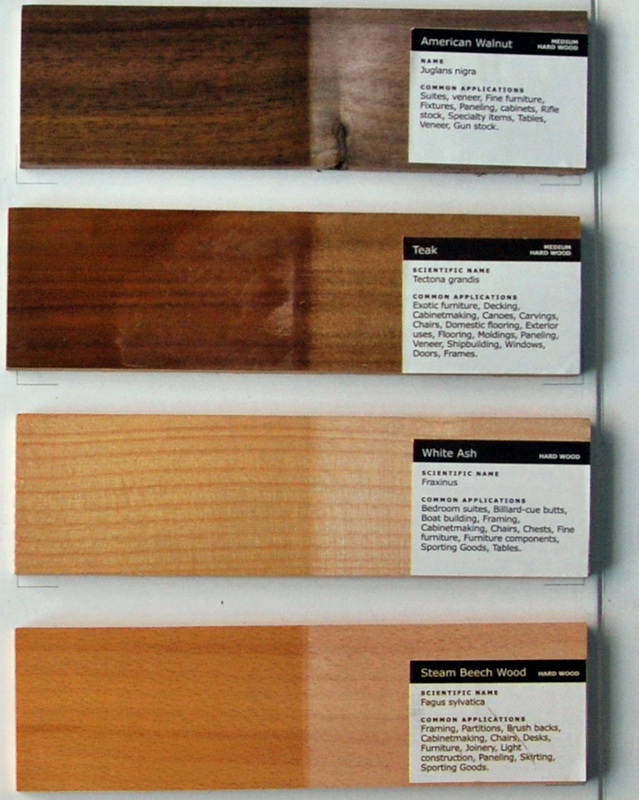   Paste Filler: This process is after sanding is complete. To determine if you need to use a wood filler, draw your fingernail across the wood grain. If your fingernail catches in many spots, a filler may be needed if you wish to achieve a flat appearance. Some feel it is a necessary step in refinishing; others believe it gives the finish a flat look. The trend today is away from filling open-grained woods. Putty Wood Filler
Note: If the filler and stain dry too fast and are difficult to remove, wipe off with coarse steel wool dipped in paint thinner. Polyester wood filler works well as an all purpose filler. Unlike 'putty wood filler', it dries hard so it can be so can be sanded easily. However they tend to shrink to some extent and may require more than one coat of filler. Polyester wood fillers are less flexible than epoxies filler. Epoxy filler can be used to repair broken and dented corners, rotting window sills, door jambs and exterior molding. Epoxy is easy to mix and to mold. When it hardens, is easy to carve and sand. It sticks very well and is formulated to flex and move with the wood, without cracking and falling out like some other wood fillers. Primer There are two types:
2 parts gum turpentine + 1 part raw linseed oil + (optional) 1/16 part Japan Drier Prime back sides of wood and out of sight areas to extent possible. Paint (high quantity of pigment) Paint is mixture of a pigment and a binding medium, usually thinned with a solvent to form a liquid vehicle. The term includes lacquer, portland cement paint, printing ink, calcimine, and whitewash. Latex emulsion paint provides such excellent durability and colour retention that it now dominates the paint market. Binder/Sanding Sealer/Sealant keep the powdery pigment together. It also determines the durability, adhesion, cohesion and flexibility of the paint. Types of Industrial Lacquers Finishes (commonly pyroxylin in an organic solvent, widely used on automobiles and furniture) : Gives intense gloss and hard finish. Unlike varnish, lacquer will melt into the previous layer, providing a very hard yet flexible finish but not all wood is easily treatable with this type of method. Rapid drying, durable but easy discoloration and scratches. It should always be sprayed on using a high-volume, low-pressure (HVLP) sprayer.
Clear film- forming (e.g. synthetic resins, varnishes) finishes provide an attractive finish for wood since they allow the natural wood color and grain to show through. Unfortunately, the durability of these finishes on wood under the action of sunlight and moisture is limited. Regardless of the number of coats applied, the film will begin to crack and peel, and the finish will have to be completely removed by sanding or with a varnish remover before a new coat is added. It contains a wood preservative, a small amount of wax as a water repellent, a resin or drying oil, and a solvent such as turpentine or mineral spirits. The fungicide inhibits surface decay. No finish will block moisture transfer fully; they just slow it down. Penetrating oils provide the least protection. Epoxy offers the greatest moisture blocking. The common wood preservatives are creosote, pentachlorophenol in oil, and water-borne salts treatments but it is not recommended for use around the home. Its suggested for use as patio decks, outside steps, privacy fences and other home uses. Mainly in use in India: Dark Walnut or Brown Mahogany colour. 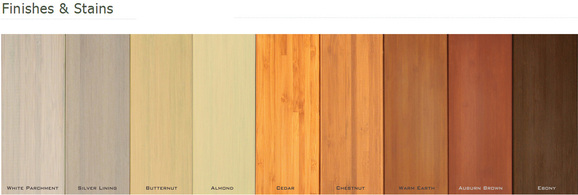 To decide if you need to stain your wood, moisten a spot with water or mineral spirits and check the colour. The moist spot is what the wood will look like with only a finisher added. Staining Stains work with the wood, allowing the natural beauty of the wood’s grain to show through. They even allow you to make cheap, uninteresting woods like popular and soft maple resemble higher-quality woods. Applying stain to architectural woodwork or furniture can draw out the wood’s grain, increasing both its beauty and the natural warmth of the wood. Most stains made today are self-sealing. Oil & water creates different colouring of the grain pattern. Staining includes glazing, toning, and shading, all ways of applying a colorant so that you can still see the wood through the colour. Exterior stains do not require any finish over them, as the stain has additives to protect the wood. However, interior stained wood is almost always finished with a clear finish over the stain. This is most commonly varnish, or a clear PU wood finish. There are two main ways of defining stains:
Stains come in these varieties,
When you stain you add colour to the wood so the net result is some combination of the stain colour you've applied, plus the colour that was originally on the wood, and possibly the colour added by the finishing top-coat. For example, a pale blue dye applied to yellow pine might result in a slight green cast. A pre-stain will soak into the wood and allow a more even penetration of the stain. It results in a more consistent and uniform colour. A "Binder" is usually needed to provide durability.
The preparation of the wood can make an extreme difference in the final finished colour. Before using any sealers on bare wood, the wood surface should be properly sanded starting with 100 grit sandpaper and working up to 150 or 180 or 220 grit sandpaper. Always sand in the direction of the grain. The advantage of a cabinet scraper over sandpaper is that it cuts the wood more cleanly than sandpaper does. When using a power sander for the final sanding, it is best to use a vibratory sander such as a quarter sheet palm sander or a mouse sander. Never use a random orbital sander, as this will put sanding marks across the grain of the wood. The term staining commonly means applying colour directly to wood. But you can also apply color in between coats of finish. This is called glazing. Or you can add colour to the finish itself and apply it to the wood. This is called shading or toning if you can still see the wood through the coloured finish, and painting if you can't. Shake or stir the stain thoroughly to fully suspend the pigment. Stain left sitting for as little as four hours will need to be shaken or stirred again. Stain can be applied with many tools: brush, rag, stain pad, cheesecloth, foam brush or some combination, to name a few. The general rule of thumb is to use natural brushes, sometimes referred to as China brushes, for all oil-based finishes (including paint), and synthetic brushes, sometimes referred to as nylon brushes, for latex, acrylic or water-based finishes. Rollers and rags can work for either type of finish. Stain should always be applied with strokes that parallel the wood’s grain. This helps ensure that the stain gets into all the wood’s grain. The stain needs to be brushed out thoroughly, not allowing it to puddle in any part of the wood. Different woods stain differently, so it is important to test the stain by taking a scrap sample of wood (if available), sanding it to the same degree and in the same way it will be sanded in the project and test the stain and the finish coat on the test piece. When applying a finish with a brush or roller you may notice some bubbles pop up. Don't panic. Many times these will settle out as the finish dries. If it's a problem, simply use a rag to wipe it down. You can often avoid this by applying a thinner coat. Also, shaking a can of finish will certainly add bubbles, so try stirring instead. The best conditions to apply are when there is as little dust or other airborne particles as possible. Clean your work area as thoroughly as possible and allow some time for the dust (literally) to settle. Consider using a dust collection system or air purifier. After the first coat dries, you'll need to either sand it with fine-grit sandpaper (220 grit, no less) or use steel wool. Just be careful not to deeply scratch the finish and certainly do not sand off the finish to the point where you reach raw wood. Wipe off the dust created and apply another coat. Try not to exceed four or five coats of finish. "The best way to get stains on uniformly is to flood them on liberally and wipe them all off," states Dresdner, "In other words, let the wood absorb what it wants to absorb. Don’t try and use stain as a paint. If you need to do a second coat, that's fine. Let it dry overnight and then do a second coat." The amount of time which the stain stays on the wood also affects the final color of the wood. Once the stain has soaked into the wood for the desired amount of time, excess stain should be wiped off with a clean cloth. It is important that this time be consistent; the more soak time allowed, the darker the stain will be. Failure to do so will result in uneven colour. Wipe in the direction of the grain, so as to not streak the wood. Another issue is blotching, that is, uneven dark spots that appear surprisingly and randomly. If your test piece results in blotching, an undercoat of wood conditioner should be applied before the stain goes on. A pre-stain will soak into the wood and allow a more even penetration of the stain. It results in a more consistent and uniform color.
Preservation & one method of Sealing Formula: 1 part boiled linseed oil + 1 part white vinegar + 1-3 part turpentine; with old nylon. 24 hours of drying before staining (without sanding). Sealers are used for several purposes:
Industrial Film Finishes or TopCoatExterior stains do not require any finish over them, as the stain has additives to protect the wood. However, interior stained wood is almost always finished with a clear finish over the stain. This is most commonly varnish, or a clear PU wood finish.
French chatoyer, meaning "to shine like a cat's eyes," refers to the depth and shimmer that some woods exhibit under the right finish and lighting conditions. Oils that tend to penetrate the wood, along with shellac, oil varnish, and to a lesser degree, lacquer, are all good candidates. French (brown polish) is difficult as it requires weeks of rubbing. How many people polish their furniture before a dinner party, only to wonder why they are so cranky before the guests arrive? Even worse, the smell of furniture polish can linger on furniture for weeks and months after use, causing a low level of air pollution that puts a strain on the central nervous systems of everyone living there. The petroleum distillates and solvents in commercial furniture polish are highly neurotoxic. There's a big difference between oil and varnish. Varnish is made by cooking one or more oils with natural or synthetic resins. The heat causes the oil and resin to combine chemically, forming an entirely new substance. Manufactures once used natural resins (fossilized sap of pine trees). Now, most varnishes are made from synthetic resins such as Alkyd, phenolic, and PU. Oil and varnish (including polyurethane) are compatible, so they can be mixed. The resulting finish performs with some of the characteristics of each. But not all mixtures of oil and varnish give the same protection. Some combinations are better than others but you have to find out on your own. Types of Varnish (finishing TopCoat): Traditionally it is a combination of a drying oil, a resin, and a thinner or solvent. It is added as final step to protect and achieve a film for gloss, over bare wood or wood that has been stained but wears out fast. Some products are marketed as a combined stain and varnish. Enamel paints contain varnish and usually dry to a hard, glossy finish. It also provides natural ultraviolet light protection. Other than acrylic and waterborne types, all varnishes are highly flammable in their liquid state due to the presence of flammable solvents and oils. Spraying is better but more difficult so it is brushed. Resin varnishes "dry" by evaporation of the solvent and harden almost immediately upon drying. Acrylic and waterborne varnishes "dry" upon evaporation of the water but experience an extended curing period. Oil, polyurethane, and epoxy varnishes remain liquid even after evaporation of the solvent but quickly begin to cure, undergoing successive stages from liquid or syrupy, to gummy, to tacky, to "dry to the touch", to hard. The amount of thinner used varies. But most common/regular wiping varnishes (including PU) brands has been thinned with 2-3 parts mineral spirits + 1 part varnish. This finish is often sold as oil but is actually a wiping varnish. A blend of straight oil and varnish (including PU). This oil/varnish mixture is often sold as Danish oil. PU wood (top-)coating (primer, catalysts & finish): It is actually not a type of finish. Instead PU is an ingredient in different types of finishes. It is merely a description of a product containing polyurethane as a resin in the mixture. Its quick drying, low odour and low toxicity. It is soluble in mineral spirits or naphtha.
(Both oil- and water-based polyurethane can be applied to latex/acrylic paint; however, oil-based polyurethane will create a yellow or amber hue, especially to light colors. To add durability without affected colour, use a water-based finish.) Nitrocellulose (NC) products The drying of NC-products occurs through evaporation of the solvent. The advantages of NC-products are: short drying time, uncomplicated application and absence of formaldehyde in its contents. The major disadvantages are: low resistance to chemical & mechanical impacts and a low build coating. Lac-based finish TopCoat: Thin Shellac resin stain is made from combining a secretion from the female lac bug with a solvent such as alcohol. It also comes in solid form or in flakes that must be dissolved and is available in number of colours. Its natural, beautiful as it adds warmth, is scratch and stain resistant but it needs lot of brush work, is less durable and dries too fast which can be difficult if you are not used to applying it. It gets affected by heat so its not recommended for kitchens, dining, or coffee tables. It can also be used as a sealer before applying a stain (to even out the stain’s application). Acid Curing (AC) products Amino resins (urea or melamine) and alkyd resins, which are often modified with nitrocellulose, are used as binders for acid-cured materials. Acid-cured materials can have one or two components. An acid hardener should be added to the two-component base before application. Lamination Melamine polish (RFT i.e., running feet for polishing): brand like Cat, sheenlac. In melamine polish, unlike resin lac topcoat, the hardener is not pre-mixed and provided separately. It has to be added separately and quickly applied before it hardens. Soap is a common wood finishing in Denmark and other Scandinavian countries. Lye (sodium hydroxide) is often used to remove paint, varnish and wax from wooden furniture. By dipping the wooden furniture in a bath filled with lye, the paint, lacquer and wax become soft and release. This results in clean and natural wood. Veneers
They are generally costlier than decorative laminates because they are thin slices of real wood (thinner than 1 mm), whereas laminates (such as Sunmica or other brands) are made from paper and plastic resins.
2 Comments
AutoCAD has many pre-defined shortcut keys and key combinations to perform various operations and functions. The [Ctrl], [Alt], and [Shift] keys, together with keyboard letter keys, provide an alternate method of entering tools, displaying palettes, and toggling modes and functions. The function keys ([F1] through [F12]) and other keys on the keyboard are also used in shortcuts.
Shift+right click for Midpoint between two points Ctrl+Shift+A for Snap to Intersection (Apparent) Ctrl+Shift+C for Snap to Center Ctrl+E for Snap to Endpoint Ctrl+Alt+E for Snap to Extension Ctrl+M for Snap to Midpoint Ctrl+Shift+Z for Snap to Node Ctrl+Shift+X for Snap to None Ctrl+Shift+P for Snap to Parallel Ctrl+P for Snap to Perpendicular Ctrl+Q for Snap to Quadrant Ctrl+T for Snap to Tangent F5 for Isoplane F10 for Polar F11 for OTRACK F12 for Dynamic Input mode W for WBLOCK ctrl+9 for Com Win PICKFIRST for If you can't do anything or if you cannot delete an object ELL for ellipse J for joint S for Stretch BR or BRLINE for break line BE for block edit BS for block save BO for Boundary SPL for Spline I for Insert DIV for divide AL for Align UCS for Rotate Screen XREF for external reference PU for Purge more: http://www.cadtutor.net/tutorials/autocad/infinite-fundamentals.php http://www.fbe.unsw.edu.au/learning/autocad/ad2/t1/ http://www.cadtutor.net/tutorials/autocad/ http://www.ellenfinkelstein.com/AutoCAD_tips.html 
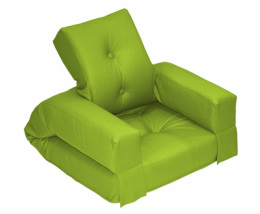
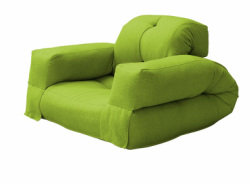
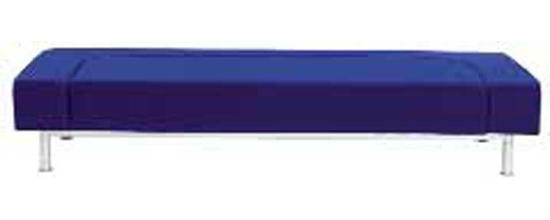
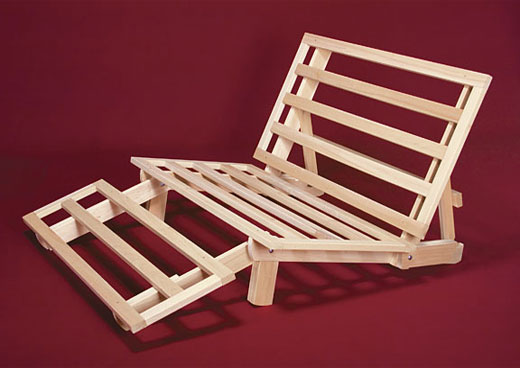
commonly, found in the market
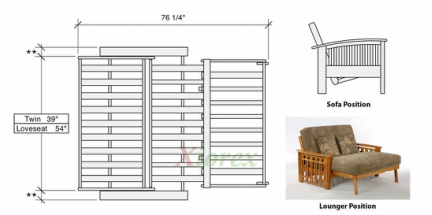
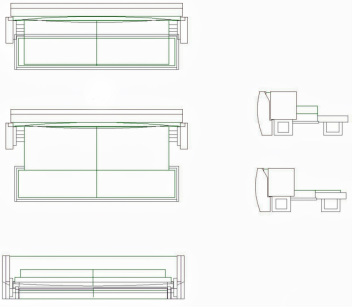
old classwork drawing
|
AuthorI am interested in unfolding scene design, character design and image design; representing contemporary narrative strategy, narrative shot and narrative style. The flowing images, which combine aesthetics and ideology. NoticeThis site contains copyrighted material for purposes that constitutes 'fair use'; and has not always been specifically authorized by the copyright owner. No fee is charged, and no money is made off this site. If you wish to use this copyrighted material for purposes of your own that go beyond 'fair use,' you must obtain permission from the copyright owner.
Archives
February 2022
Categories |

 RSS Feed
